

Key Takeaways
-
Know your floor finish, wood species and wear level before you start work so you select cleaners that work together and set realistic shine goals.
-
Prep, deep clean, polish and buff to get consistent high gloss results with our four-step shine restoration method.
-
Apply hardwood-safe solutions with soft tools like microfiber mops and polishing pads to avoid stripping the finish or scratching.
-
Implement everyday and weekly practices like sweeping, quick spill cleanups and occasional buffing to maintain shine and minimize deep restoration needs.
-
Steer clear of pitfalls such as too much moisture, abrasive implements, and harsh cleaners that can warp, dull, or otherwise damage the finish.
-
Call out the big guns when damage is deep or widespread or when numerous attempts to polish them yourself still won’t make your floors shine.
How to make hardwood floors shine again is a process for removing dullness and restoring gloss. Easy maintenance can restore shine to hardwood floors, like a little cleaning, a light sanding of worn finish, and applying a compatible finish or polish.
Employ pH-neutral cleaners, microfiber mops, and a soft cloth for spot buffing. For more extensive wear, look to screened recoating or a fresh polyurethane layer.
How to Make Hardwood Floors Shine Again The following guide lists tools, materials, and step-by-step methods for common floor conditions.
Understand Your Floor
Know your floor, the fundamentals of what you’re about to clean so what you do makes it shine, not wreck it. Know your finish, species, and wear level before you start. This allows you to select cleaners, pads, and polishes that are appropriate to the floor and avoids mistakes such as using oil soap on polyurethane or abrasive pads on soft woods.
Here’s a quick checklist to record your floor type and condition for easy reference.
-
Finish: polyurethane, oil, wax, other — water drop test result, manufacturer label
-
Species: oak, maple, cherry, bamboo, engineered — hardness rating if known.
-
Wear level: like new, light wear, moderate scratches, heavy wear, water damage
-
High-traffic zones: rooms and pathways with visible dulling
-
Last maintenance: date of deep clean, last polish or recoating
-
Known repairs: boards replaced, gaps, or finish failures
Finish Type
Determine finish by checking product records or doing a water drop test: a bead means polyurethane or sealed surface; quick absorption indicates oil or natural finish; softening or smearing can suggest wax.
Know Your Floor ~ Use cleaners and polishes specifically for that finish only. For instance, water-based polyurethane will take pH-neutral cleaners and lots of commercial polishes, while waxed floors require wax-compatible products and buffing with a soft pad.
High-gloss finishes reveal scratches and dirt more easily, so go easy and stick to microfibre mops. Pros and cons: polyurethane is durable and low maintenance but highlights flaws; oil provides a warmer look and easier spot repairs but needs oil-compatible cleansers; wax restores warmth and fills minor scratches but requires periodic stripping and re-waxing; other finishes require following manufacturer guidance.
Wear Level
Pay close attention to high-traffic rooms such as your living or dining rooms for dull patches, loose finish or abrasions. Targeted polishing or spot restoration works best on localized wear. Full-room treatments suit widespread dulling.
Track patterns: entryways, hallways, and under furniture often wear faster. Note this to shift mats, add felt pads, or increase cleaning frequency. Test a fresh sample board or pristine closet piece against your well-walked surfaces to establish achievable shine targets. Occasionally, a light sanding and recoat is the sole method to recapture that factory shine.
Wood Species
Identify species: Oak shows open grain, maple has tighter grain, and cherry darkens with age. Softer woods like pine or birch scratch more readily and require gentler pads and less aggressive buffing.
Go for microfiber or lambswool pads when dealing with softer species. The denser woods can handle firmer pads and stronger polishes. Match cleaners: Use pH-neutral for most hardwoods, oil-based cleaners for oiled floors, and no-wax solutions for sealed polyurethane.
|
Species |
Hardness note |
Recommended pad/cleaner |
|---|---|---|
|
Oak |
Hard, open grain |
Microfibre, pH-neutral cleaner |
|
Maple |
Hard, tight grain |
Soft pad, gentle cleaner |
|
Cherry |
Moderate, darkens |
Lambswool, oil-compatible cleaner |
|
Pine |
Soft, dents easily |
Very soft pad, minimal abrasion |
|
Engineered |
Varies |
Follow top-layer species guidance |
The Shine Restoration Method
Restoring shine to hardwood floors requires a clear sequence: prepare, clean deeply, polish targeted areas, then buff for a lasting gloss. So collect your supplies and solutions ahead of time, and expect a few hours per room as each step dries and sets. Here is a process that explains the work and why it is important on a numbered basis.
-
Preparation: Remove furniture, rugs, and obstacles. Vacuum and sweep. Spot-clean sticky or stained areas. Ensure the floor is dry before step two. A crystal clear space keeps new scratches away and allows you to work without interruption.
Employ a soft-bristled broom or surface vacuum to aerosolize and lift grit, and remember to check baseboards and corners for lurking debris. For sticky residue, sanitize with a damp rag and mild cleaner, then dry the patch with a towel. This step minimizes the risk of encasing dirt beneath pads or polish.
-
Deep cleaning: Choose a safe floor cleaner such as a Bona spray, a natural cleaner, or a mild dish detergent diluted in water. Mop with minimal moisture. Use a gentle mop head, such as microfiber or a Bona mop, so your finish isn’t abraded by rough fibers.
For stubborn dirt, a moist scouring pad or old flannel diaper gets the job done. Stay away from abrasive scrubbers that will scuff the finish. Once scrubbed, clean the floor with a clean damp rag to remove residue. Then let the floor dry completely. Moisture left behind will cloud finishes or cause cupping.
-
Targeted polishing: Select a product suited to your finish, such as bona polish, Rejuvenate Wood Floor Restorer, or a comparable brand, and apply it with a polishing or wool pad. Treat dull or scratched spots first, applying with soft, even strokes along the grain.
Use thin, even coats. Too much will leave buildup that looks cloudy instead of glossy. Allow the product to set as directed. The setting time allows the polymers to bond together and fill in micro scratches, creating a reflective surface.
-
Final buffing: Use a clean, dry cloth diaper, rag, or a dedicated polishing pad to buff the floor in small sections. Circular motions assist in distributing and equalizing the shine while maintaining gentle, uniform pressure.
Check in the sunlight to identify missed areas or streaks. Repeat buffing in high-traffic zones where shine wears faster, and you may want to apply a second thin polish coat in these areas for added durability.
Allocate sufficient time: each step may take from 30 minutes to several hours, including drying. Gearing up—mops, pads, cleaners, rags—prepped in advance keeps the work moving and the bugs at bay.
Selecting Your Arsenal
Choosing your weapons is the most action-oriented move towards recapturing hardwood lustre. Tailor cleaners and pads to your floor’s finish and species, choose tried-and-true over fly-by-night, and establish a little station where everything is accessible for both maintenance and deep work.
Cleaning Solutions
Go for a cleaner marked safe for hardwoods. Most pro and consumer tests are more successful when you begin with a tried-and-true product versus the experimental type. Products such as Bona cleaning spray and old-fashioned oil soaps are designed to cleanse without removing finishes.
Steer clear of bleach, ammonia, and other harsh chemicals that will dull or damage the finish. Certain cleaners do deposit chalky residue, so if that’s a concern, check for “no-residue” assertions or consumers who speak to a clean, clear surface.
You can mix a simple DIY cleaner by diluting a mild dish soap in warm water, using about 5 mL of soap per liter of water, and use it sparingly. Try any recipe in a closet first. Note that floor finish dictates choice. Some polyurethane finishes take ready-to-use sprays, while waxed or oil-finished floors may need specific oil soaps or refinishing products.
Approved cleaners for common finishes and species:
-
Water-based polyurethane: Bona Hardwood Cleaner, pH neutral floor cleaners
-
Oil-modified polyurethane: oil soap products labeled for hardwoods
-
Waxed/oiled floors: specialized oil cleaners, diluted wax-friendly solutions
-
Hardwoods with sensitive stains require enzyme-based spot cleaners. Test first.
-
No-residue preferences: “no-wax” and “no-residue” formulations
Product timing and dry times are different. Some polishes or restorers need a 24 hour interval between coats. A different brand enables several coats within a couple of hours. Think about your schedule when making your selection.
Application Tools
You’ll want a soft mop or your own Bona mop with Bona microfiber cleaning pads, which allow you to spread cleaners evenly and avoid scratching your floor. Microfiber grabs dust and grit better than cotton.
Reserve a different polishing pad or wool bonnet for the Rejuvenates and such. Change out mop heads and pads often. A tired pad will embed grit and distribute scratches.
Not abrasive scrubbers or stiff-bristle brushes, mind you. They generate micro-scratches that diminish shine with every use. Stock up on a mop, spare microfiber pads, a polishing pad, a soft-bristled broom, and a small drill-attached buffing pad if you plan deeper polish work.
Store these in one bin or on one shelf close to where you clean for easy access.
Sustaining The Luster
Ongoing maintenance prevents shine loss before it begins. Every day dust, grit, and micro scratches accumulate and matte the finish. Sustaining the luster is a transparent strategy that integrates daily habits, a weekly schedule, and environmental control to keep flooring shiny and extend the lifetime of the finish.
Daily Habits
Sweep or surface vacuum daily to keep dust, dirt, and debris off the floor. Dirt, in particular, is like sandpaper on your floor and creates micro abrasions that diffuse light, thus creating dull-looking floors. Set place mats at all entries to capture outside grit.
Select low-moisture mats and wash them frequently so they don’t become a secondary source of dirt. Clean spills promptly with a dry or barely damp rag to avoid moisture penetrating seams, resulting in stains or cupping. Try to convince your family not to traipse around on floors with high heels or hard-soled shoes.
These create dents and focused wearing that fracture the glossy reflective surface. A quick daily regimen minimizes the requirement for harsher days of polishing down the line.
Weekly Routine
Mop floors weekly with a hardwood floor cleaner formulated for sealed woods. Skip straight water or fierce detergents that pull the finish. Clean with a microfiber mop and light spray to cut through the grime without over-wetting the wood.
Buff living and dining rooms—hard-wear zones that tend to develop wear patterns—to recover small losses in sheen. A quick buff with a dry microfiber pad reduces the effort required for deeper polishes. Rotate rugs and shift small pieces of furniture from time to time to avoid wear and fading unevenly across big areas.
Check floors weekly for fresh scratches or dull patches and treat immediately. Spot polish or a touch-up product goes a long way if taken care of promptly.
Environmental Control
Keep your indoor humidity levels between 35 to 55 percent to avoid expansion, contraction, warping, and cupping, with 40 to 60 percent being a safe band according to many sources, depending on your local climate.
Use blinds or curtains to block direct sunlight that fades color and deteriorates finish over time. Put felt pads underneath furniture legs and check them every so often for grit accumulation. Maintain pets’ nails trimmed to minimize those little scrapes that collect and scatter light.
Ongoing Maintenance Tips
-
Re-luster with a hardwood floor luster every two to six months, depending on traffic.
-
Select a polish or restorer appropriate to the floor type and finish.
-
Test any product in a hidden spot first.
-
Utilize area rugs in high traffic areas and entry mudrooms.
-
Plan on having your furniture professionally refinished when scratches are deep or the finish is thin.
Damaging Mistakes
Cleaning, polishing or recoating mistakes are usually permanent and expensive. Dirt, the wrong products, too much water and abrasive cleaning tools all take their toll on hardwood flooring. They detail what not to do, why each error is important and how to safeguard your floor and investment.
Wrong Cleaners
Never use bleach, vinegar, or ammonia-based solutions. These can leave a chalky residue and strip finishes. Even generic all-purpose cleaners that don’t have a hardwood-safe label frequently contain solvents or waxes that react poorly with factory finishes.
Read product labels to correlate cleaner chemistry with your floor’s finish and wood species. Make damaging mistakes like recoating without checking compatibility. Applying a shine product prior to cleaning captures grit and oils, creating a dull, patchy film.
Keep inappropriate cleaners out of your hardwood supplies to prevent accidental use. For example, a homeowner who used a citrus degreaser found the new finish would not adhere because the solvent left a residue. Proper label reading would have prevented that.
Excess Moisture
Don’t saturate mops or leave puddles on hardwood. Moisture migrates into the seams, leading to possible cupping, warping or finish failure. Be sure to always wring mops and cloths thoroughly and dry the surface immediately after cleaning.
If you live in a humid climate, use a dehumidifier to maintain stable room humidity, as sustained high humidity will lift the wood’s moisture content and cause long-term issues. Especially if you’re buffing or recoating, moisture trapped beneath a new coat can bubble or fail to bond well to the previous one.
A wet-mop session followed by a rainstorm led to cupped boards that required sanding.
Abrasive Tools
Stay away from steel wool, hard-bristle brushes, and rough scrubbers, as they scratch and dull the surface. Use soft mops, microfiber, or cotton pads for washing and polishing. Wear on pads occurs when pads with embedded grit gouge fine scratches that turn into visible wear.
Choose the correct pad or screen for the finish. The wrong pad during buffing can remove too much finish or leave scratches. Polishing on top of grime or old wax can create a slick sheen that hides embedded sand and scratches, but it results in a pockmarked gloss coat that quickly wears away.
Keep abrasives separate so they do not infect tender cleaning implements. If the floor exhibits deep wear, rely on sanding and refinishing rather than a light screen and recoat, or the recoat will fail.
When To Call Professionals
When surface cleaning and buffing and store-bought products simply won’t bring back the shine, that’s when the pros are a very sensible next move. Professionals evaluate what’s beneath, make smart decisions about materials and deploy tools most homeowners can’t access. This sidesteps mistakes that can actually worsen damage and may be pricier to repair down the road.
Contact professionals if your floors have deep scratches, severe dullness, or need refinishing beyond DIY methods.
Deep scratches that cut into the finish or into the wood itself usually need sanding and a new finish. Severe dullness after repeated cleaning or polishing often means the protective layer has worn through. A pro will inspect the depth of damage, test a small area, and recommend light sanding, screen-and-recoat, or full refinishing.
For example, a living room with chair-scrape lines and loss of gloss across traffic paths will likely need more than a mop and polish.
Seek help for large areas of damage or when multiple coats of polish have failed to restore shine.
When multiple rooms or long runs of flooring exhibit consistent wear, DIY spot patches are prohibitively inefficient. Several attempts with polish don’t work, then the finish breaks or impurities build in.
Professionals can strip old products, wash away residue, and apply the appropriate number of coats with regulated drying times. This is typical in open-plan spaces or rental properties where wear is general and you want consistent results.
Hire experts for delicate hardwoods or specialty finishes that require advanced care.
Certain woods and finishes, such as oil-based, water-pop, hand-scraped, or prefinished UV-cured coatings, require specialized products and methods. The wrong stripper or abrasive may alter color, create patchy gloss, or damage veneer layers.
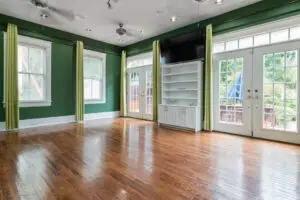
Professionals who know oak, teak, or exotic hardwoods will select cleaners and finish systems that work best for the species and can match sheens to keep things consistent.
Schedule professional cleanings periodically to maintain long-term floor health and appearance.
Schedule professional maintenance once every 12 to 16 months to keep floors in tip-top shape and prevent expensive restoration. Ongoing maintenance stops buildup, minimizes abrasion from grit and keeps finish life longer.
They can apply maintenance coatings that rejuvenate resilience and gloss without full sanding. When in doubt about how to treat a particular concern or finish, call in a professional so you don’t make matters worse.
When there’s been improper past care or severe wear, they can restore or suggest replacement to save the floor’s worth. Professionals can bring back the beauty and strength of sunken floors.
Conclusion
Here’s how to make hardwood floors shine again. Sweep up loose dirt first. Try it on a small spot with your cleaner of choice. Employ gentle implements and minimal moisture techniques to sluice up dirt without damage. Buff or polish with a clean cloth or machine for a uniform shine. Choose products for your specific finish and read the labels. Touch-up kits can repair scratches, and area rugs work well in high-traffic areas. Steer clear of harsh cleaners, steam, and wax on polyurethane finishes.
If the damage is deeper or the floor still feels lackluster after home care, contact a professional for sanding or recoating. Test us with one little project this week, a focused cleaning and quick polish, and see the floor go from tired to bright.
Frequently Asked Questions
How often should I deep-clean hardwood to keep it shiny?
Deep-clean well every 6 to 12 months. Light cleaning with a pH-neutral hardwood cleaner should occur weekly or as needed. Routine maintenance prolongs finish life and preserves floor shine.
Can I use vinegar or DIY solutions to restore shine?
Straight vinegar or ammonia, no. They dull the finish. Mop with a diluted, pH-neutral wood cleaner or manufacturer-recommended product for safe, fast results.
Will buffing or polishing remove scratches and restore shine?
Buffing brings back surface shine and minimizes micro scratches. Deep gouges require sanding and refinishing. Use a low-speed buffer or microfiber pad for safe and even results.
Which products are best for high-gloss vs. matte floors?
Go for products labeled for your finish type. Your high-gloss floors will appreciate polish or restorer. Matte floors require matte-specific cleaners or water-based restorers to prevent shine.
How do I prevent future dulling and damage?
Soft furniture pads, area rugs in busy areas, doormats, and no wet mopping. Keep humidity around 40 to 60 percent to minimize wood expansion and contraction and finish cracking.
Can I restore shine on engineered hardwood the same way as solid wood?
Yes, for surface dullness, use the same cleaners and restorers. If the wear layer is slim, do not sand. You probably cannot refinish. Consult manufacturer boundaries prior to intense treatments.
When should I hire a professional for floor restoration?
Call a pro if large areas require sanding, the finish is worn deeply, or you desire color matching and durability. Professionals do all the right sanding, staining, and sealing.