

Key Takeaways
-
Incorrect installation is the biggest cause of carpet ripples. Always employ installers who use a power stretcher and adhere to full stretching and tack strip methods to avoid slack.
-
Moisture and humidity will expand fibers and loosen glue. Control indoor humidity, repair leaks quickly, and run dehumidifiers in high moisture areas.
-
Let new carpet and padding acclimate in the installation room for at least 24 hours to prevent differential expansion that causes waves.
-
Check and fix subfloors pre-installation: Uneven or moist subfloors pose long term rippling risks and transfer moisture to the carpet.
-
For small ripples, attempt controlled steam and drying, but trust the professional with a power stretcher for stubborn or large wrinkles.
-
Select quality carpet, backing, and underlay appropriate to your weather and traffic. Check installer references, tools, and warranties to minimize future grief.
Why does carpet ripple after installation? When the carpet ripples after it’s installed, either the material relaxed, the underlay compressed, or the tack strip and seams didn’t hold.
Causes for carpet ripples are typically humidity, stretching issues during fitting, low quality padding, and heavy foot traffic that moves fibers. Ripples can sometimes appear weeks to months after fitting and differ by carpet type and room conditions.
Repair options, from restretching to replacing pad, cost and durability vary depending on the underlying cause.
Ripple Causes
Carpet ripples occur when these forces exceed the tension holding the carpet flat. Causes vary from installer technique and material defects to environmental conditions and wear. Here is a focused breakdown of the primary culprits so readers can pinpoint probable origins and schedule fixes or preventive measures.
1. Installation
Improper installation is the number one cause of ripple and buckling. Professional fitters employ a power stretcher to apply uniform, durable tension. Absent that tool, installers often depend on knee kickers that create slack and localized ripples.
Tack strips misplaced or fastened and wrong glue let edges pull away, so tension gives out again and again. Wall-to-wall installations need to be sequentially stretched along every wall and seamed properly. Missed passes or skipped steps frequently manifest as immediate ripples or subsequent shifting once the carpet or shag eases up.
Manufacturing issues play a role. If the secondary backing tension does not match the primary backing, the carpet can be uneven even when installed perfectly.
2. Humidity
Humidity impacts not just fibers but backing. Damp interior air or quick changes in temperature and moisture make fibers and backing expand, resulting in ripples. Rooms that are poorly ventilated, without air conditioning, or subject to seasonal climate swings are particularly susceptible.
Whether it’s a spill, plumbing leak, or wet cleaning, moisture weakens glues and causes buckling. Extended moisture exposure can even result in mildew and structural damage, amplifying the ripples. Track with a hygrometer and add a dehumidifier where necessary to preserve carpet integrity.
3. Acclimation
Carpets require some time to adjust to room conditions. Let new carpet sit in the installation room for a minimum of 24 hours to allow temperature and humidity to equilibrate. Skipping acclimation can cause one section to expand or contract more than another section, creating ripples after the pieces have settled.
Good acclimation relieves stress between backing layers and fiber faces and decreases the likelihood of waves after installation.
4. Padding
Padding impacts ground stability. Underpad that’s too thick or thin versus manufacturer specs can allow the carpet to shift and ripple. Poor quality padding can compress unevenly.
Aged or damaged pads lose resiliency and enable traffic to cause buckling. Improper pad installation, such as seams misaligned or adhesive missing where necessary, makes cleaning and maintenance more difficult and raises ripple risk.
5. Subfloor
Uneven, destroyed or wet subfloors are a typical underlying cause. High points or voids generate local stresses that manifest on the carpet surface. Moisture from subfloors can leach into the carpet backing and encourage it to shrink or grow.
Check, fix and make sure that the subfloor is clean, dry and level before you lay carpet.
Diagnosis
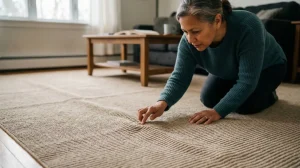
Carpet rippling appears as visible waves, wrinkles, or even sharp creases on the floor. Examine it carefully for elevated ridges and close wrinkles. Press in a few places. A well-installed carpet will resist, but a loose carpet will slide under your hands.
Compare the affected areas with flat sections to estimate the extent of the damage. Take obvious photos at various angles and dates to capture the original state and any progression. Pictures assist installers or flooring experts in detecting wear patterns and chronology.
Ripple Timing
Mark when the ripples originate. If ripples appear soon after installation, incorrect installation is the most probable culprit, too little stretching, bad seam joins, or incorrect padding. Early rippling typically occurs soon after installers skip power stretching or use cheap tack strips.
If ripples develop months or years down the road, environmental conditions such as shifting humidity or natural material aging are usual suspects. Carpets soak moisture out of the air in high humidity, swell and wave. This occurs more frequently in the warm months when indoor humidity is above 50%.
If your laminate is rippling suddenly after a deep clean, a water leak or heavy steam cleaning indicates moisture, not poor original installation. Record specific cleaning, leaks, and weather dates to connect action to result. Maintain a basic timeline, installation, cleaning, and noticed ripples, to help make diagnosis clearer.
Ripple Location
Diagram the room and map where ripples focus. Waves near walls or around room edges frequently indicate that the carpet wasn’t stretched enough at the perimeter or that the tack strips lost their grip. Waves under heavy furniture may stem from slow material stretch and compression over time.
Those furniture pieces can conceal early signs until items are unburdened and moved. High-traffic areas that ripple suggest under-padding or repeated wear that allows the carpet to shift. Inspect seams and transitions to other flooring.
Ripples in aisles with seams can indicate bad seam fusion or wrong seam tape. Document all impacted rooms and whether patterns recur across rooms. If multiple rooms have matching ripples, whole-house moisture or uniform installation technique may be the culprit.
Give this list to a pro. It helps him or her diagnose whether to re-stretch, replace padding, adjust humidity, or partial replacement.
Corrective Actions
Carpet rippling can be caused by substandard installation, fluctuations in humidity, heavy foot traffic, or deteriorating glue and padding. Corrective actions seek to eliminate slack, re-tension, and control environments so ripples don’t come back. Some incidents mend themselves. Persistent or serious waves typically require repair.
-
Re-stretching the carpet with a power stretcher removes slack and wrinkles.
-
Reset tack strips and carpet edges.
-
Carefully trim excess carpet at walls and refasten it to fit tightly.
-
Inspect and switch out underlay or padding if it is crushed or subpar.
-
Control humidity and moisture with dehumidifiers or HVAC adjustments.
-
For small ripples, steam relaxes the fibers. Too much steam can cause issues.
-
Check for leaks or sources and get them fixed.
-
Call in a pro installer or cleaner for deep or large areas of rippling.
Re-stretching
Take corrective actions such as using a power stretcher to pull the carpet tight across the room and remove slack that causes waves. A knee kicker can work in small areas, but only a power stretcher gives you the long lever arm required to reach corners and maintain flat seams.
Pull up baseboards as needed for complete access and cut away excess carpet so it lies flat against the wall. Tack strips can come loose after being walked on repeatedly or if they were nailed in incorrectly in the first place. Take them up and reset them on a clean, dry subfloor.
Replace strips that are broken or have lost pins. Once stretched, attach carpet edges tightly to these strips and replace baseboards. If re-stretched, it usually smooths out any ripples caused by either a bad initial install or seasonal shifting. Still, severe instances may require a full re-install.
Humidity Control
Take corrective actions by installing a dehumidifier or running the air conditioner to maintain indoor relative humidity stability, ideally between 30 and 50 percent for most climates. Basements and coastal areas should be periodically checked as high moisture there can loosen adhesive and cause buckling.
Check for leaks around your windows, plumbing, and exterior walls. Drying and repairing after water intrusion prevents breakdown of latex backing. Close windows on humid days to reduce moisture intrusion.
For long-term prevention, select a good padding that matches the carpet type. Correct padding maintains the carpet’s support and minimizes any movement that causes rippling. There’s less wear and less need for corrective action if you clean and maintain regularly.
Steam Treatment
Use a monitored steam application over the wavy portions to relax the carpet fibers as steam heats and softens the creases and allows the pile to settle. Take advantage of a trusted carpet steam cleaning or a professional one that can control heat and prevent overwetting.
Do not over-steam. Excessive heat and moisture can weaken latex glue or secondary backing and create new problems. Once steamed, let your carpet dry completely for 24 to 48 hours, using fans or dehumidifiers if necessary.
For small ripples, this can do the trick, but bigger or frequent waves typically require re-stretching or expert patchwork.
Prevention
Carpet rippling can be avoided if you consider the materials, the skill of the installer, and indoor climate pre, during, and post installation. The prevention steps below describe actionable steps to minimize the risk of waves developing along with illustrative examples and concrete targets to inform decision making.
-
Summary of key prevention tips:
-
Acclimatize carpet and underlay in the room for a minimum of 24 hours.
-
Use a premium underlay and change old padding when required.
-
Ask installers to employ a power stretcher and stretch one to one and a half percent in both directions.
-
Keep indoor humidity between 30 and 50 percent and avoid rapid swings.
-
Put moisture barriers in wherever it is prone.
-
Vet installers for references, warranties, and a defined installation plan.
-
Move and position furniture to prevent stressing the carpet.
-
Check HVAC and humidification systems.
-
Installer Vetting
Request recent references and check out reviews that reference long-term carpet flatness. Reference checks should verify that the installer regularly relies on a power stretcher, not knee kickers.
Power stretching is necessary to maintain a tight 1 to 1.5 percent stretch in both directions prior to anchoring carpet to tack strips. Ask for a detailed installation plan addressing acclimation, subfloor preparation, and tack-strip locations.
Check warranty terms for installation-related ripples and if the installer will come back and re-stretch or replace padding if issues arise.
Proper Acclimation
Leave carpet rolls and underlay in the room itself for a minimum of 24 hours prior to laying so fibers, backing, and padding can acclimatize to room temperature and humidity.
Try not to install immediately after delivery from cold trucks or wet storage, as abrupt transitions cause fibers to relax later and develop ripples. Acclimate carpet and underpad collectively.
Mismatched conditions between layers can create uneven shrinkage. If a home has been closed up for seasons, consider running HVAC to normal living conditions a few days before delivery to regulate humidity around the ideal 30 to 50 percent.
Climate Control
Keep consistent indoor humidity levels. Thirty to fifty percent is ideal to minimize expansion and contraction that leads to waves.
Use humidifiers, dehumidifiers, or smart HVAC controls to prevent abrupt swings, particularly in summer when moisture levels can soar. Cover basements or ground floors with moisture barriers where dampness is prevalent.
Have HVAC systems inspected and serviced regularly to maintain airflow and humidity control. Be careful with furniture moves, as heavy pieces will compact pads unevenly and cause ripples down the line.
If ripples persist, replace the underlay. Old or cheap padding is usually the culprit.
Carpet Material
Carpet material is key in determining if ripples occur post installation. Various fibers, backing systems, thicknesses, and densities react to humidity, wear, and age differently. The proper blend lessens the risk of buckling, while the improper mix makes ripples more probable either soon after installation or years down the line as materials dry out or delaminate.
Here’s a quick cheat sheet comparing common carpet fiber types and basic properties to help direct selection.
|
Fiber Type |
Durability |
Elasticity / Resilience |
Moisture Response |
Typical Uses |
|---|---|---|---|---|
|
Nylon |
High |
Excellent |
Moderate — holds dye well, stable when dry |
High-traffic areas, stairs, living rooms |
|
Polyester |
Medium |
Good |
Less absorbent, resists staining |
Low-to-medium traffic, bedrooms |
|
Olefin (Polypropylene) |
Medium |
Fair |
Low moisture absorption, can flatten |
Basements, commercial loop piles |
|
Wool (natural) |
High |
Good |
Absorbs moisture; can swell |
Luxury rooms, low-traffic formal spaces |
|
Triexta (PTT) |
High |
Very good |
Good stain and moisture handling |
Active homes, family rooms |
Backing Type
Seek multi-layer backing systems with robust primary backing and woven or bonded secondary backing. Look for a cushion or pad rating and suggested tack strip types. Opt for backings that are humidity stable or designed to resist delamination.
Stay away from flimsy, one-ply backings that provide minimal dimensional stability. Seek manufacturer warranty details addressing buckling and adhesive failures.
Just stay away from the flimsy, thin-backed junk that bends and waves. Thin latex or thinly bonded secondary backings may separate with humidity changes or heavy use and cause delamination.
Consult manufacturer specs for your floor; they often specify which backing is appropriate for radiant-heat systems or moisture-prone basements. Be aware that latex-backed carpets can be more susceptible to humidity and stretching, particularly in regions or seasons when indoor levels are above the recommended range.
Fiber Type
Go nylon or polyester for more resistance to rippling during standard household use. Nylon is very resilient and bounces back after being crushed, while polyester resists stains and bleeds less dye.
Natural fibers such as wool absorb and evaporate moisture more easily, leading to potential temporary expansion or permanent distortion. Consider fiber types for stain resistance, resilience, and care requirements and balance them against the room’s foot traffic and cleaning routine.
Select fibers that match cleaning routines. Frequent shampooing and high humidity favor synthetic blends, while low-traffic formal rooms may suit wool. Properly installed carpet under a decade old shouldn’t ripple.
It should be power-stretched about 1 to 1.5 percent in both directions, with indoor humidity maintained between 30 and 50 percent to prevent moisture-induced stretching.
The Installer’s Perspective
Installers try to provide a flat, long-lasting carpet but have physical constraints that influence results. Before a single nail or staple, they evaluate the subfloor, material moisture, site humidity and schedule. This brief summary describes why ripples develop from an installer’s perspective and what actions minimize the danger.
Hidden Pressures
Uneven subflooring is a key source of tension. Little dips, loose boards, or residual glue affect how a carpet lies and eventually manifests as ripples. Furniture layout counts as well. Heavy chairs or a sofa sitting before the carpet settles can induce local buckling.
Time pressure from punchy schedules can drive an installer to forsake full acclimation or thorough re-leveling, increasing the likelihood of issues down the line. Environmental swings, sudden humidity or temperature shifts, cause fibers to relax or tighten.
Installers have to account for these unseen impactors. From the installer’s point of view, it’s good practice to walk the site, identify probable trouble areas, and flag them to the client so mitigation, such as shimming, patching, or delaying work, can minimize future ripple risks.
The Right Tools
|
Tool |
Purpose |
|---|---|
|
Power stretcher |
Required for broadloom carpets (3.7–4.6 m wide rolls) to tension carpet across the room |
|
Knee kicker |
Precision adjustment by walls and trims |
|
Moisture meter |
Measure subfloor moisture pre-install |
|
Leveling tools |
Identify and fix uneven subfloors |
|
Premium tack strips and adhesives |
Reinforced edges and seams to avoid slack |
|
Rug doctor |
Vacuum up bits of rubble and assist settling of fibers after install |
Manufacturers anticipate installers employing certain tools and methods. You’ll need a power stretcher for broadloom (12–15 ft) to prevent loose spots. The Installer’s Point of View Proper adhesives and tack strips hold edges tight, cheap or wrong products let seams separate.
The installer’s perspective is to use moisture meters and levelers to follow specs. Padding choice matters: aim for at least 8 lb density and no more than 3/8 inch thickness. Too thick or low-density pad, plus dense or overly thick carpet, can cause waves, especially if seams are too close. Keep seams offset at least 15 cm (6 in.).
Client Communication
Explain steps: Acclimate carpet and materials in the space for at least 24 hours at 18 to 35 degrees Celsius. Explain why a power stretcher is needed and what padding will be used. Be realistic about possible ripples and how they are managed.
Repair fees range often from $75 to $300 per hour. Provide specific maintenance tips such as vacuuming, not placing heavy furniture too early, and tracking humidity. Have them take photos and report ripples that show up within the first year back to the retailer for possible warranty or repair options.
Provide written care instructions and what to do if buckles so homeowners can take swift action.
Conclusion
Carpet ripples develop due to improper fitting, environmental moisture fluctuations, substandard padding, or foundation movements. Most ripples appear within months. Simple checks help spot the cause: look for wrinkles, tug the edge by the baseboard, and note high-moisture areas. Solutions include re-stretching and replacing the underlying padding or even repairing the subfloor. Select low-stretch fibers and dense padding to reduce danger. A good installer who uses the proper equipment and adhesive or tack-strip methods goes a long way. For tenants, maintain consistent humidity and don’t wet clean to saturate the backing. For homeowners, book a quick fix at the initial appearance of ripples. Schedule a professional today for a check-up and transparent restoration plan.
Frequently Asked Questions
Why does my carpet ripple soon after installation?
Carpet ripples after installation usually occur due to inadequate stretching when installed, misplaced tack strips, or excessive moisture. A professional installer will stretch it out and attach it so that it doesn’t ripple. Correcting ripples soon after they appear avoids permanent damage and potential tripping.
Can humidity cause carpet rippling?
Yes. Excessive humidity or moisture causes backing and fibers to expand, resulting in ripples. Lowering indoor humidity and drying out the carpet will assist, although extreme buckling will require expert restretching.
How do installers diagnose carpet ripples?
Installers check stretch, tack strips, seam integrity, and underlay. They measure buckle dimensions and identify the underlying cause of the issue, which could be an installation mistake, a subfloor problem, or expansion, prior to suggesting a repair method.
What are the common corrective actions for rippled carpet?
Common solutions are power stretching, re-securing or replacing tack strips, adjusting seams, or replacing the underlay. Power stretching by a pro generally recovers a flat, safe surface quickly and effectively.
Can I fix carpet ripples myself?
Light ripples may occasionally be relaxed with drying out and light traffic. Power stretching needs expertise and equipment. When you call in a professional, you’re guaranteed a secure, long-lasting repair and your carpet warranty remains protected.
Do certain carpet materials ripple more than others?
Yes. Loop pile and low-twist nylon resist rippling best. Thick plush, heavy-textured, or older carpets that have a weak backing are more vulnerable to waves. Picking solid materials keeps you out of trouble down the road.
How can I prevent carpet ripples before installation?
To prevent ripples, hire a quality, experienced installer, use a good underlay, make sure the tack strips are placed correctly, and maintain a dry indoor environment. Open communication and verifying installer references minimize harm.