

Key Takeaways
-
Determine and write down the specifics of your current floor: species, color, finish, grain, and plank size to help you match it and assist you in your shopping excursions.
-
Always test color and finish samples in the real rooms under varying lighting and note stain formulas and sheen for less surprises.
-
Match plank dimensions and direction, and subfloor and underlayment differences to prevent visible seams, height mismatches, or installation issues.
-
Anticipate natural variation from aging, fading, or discontinued products and strategize practical solutions such as custom staining, refinishing, or choosing similar options.
-
Professionally overseen transitions, such as T-molding, borders, and threshold strips, do a lot to tastefully link different floorings together.
-
Consult flooring pros for expert sourcing, bespoke staining or challenging installations for the best color match and durability.
Matching new flooring to existing flooring is all about selecting materials, colors, and profiles that flow from room to room. It involves plank width, thickness check, and finish sheen in the mix to ensure seams don’t show.
If you’re matching new flooring to existing flooring, think about underlayment, transition strips, and moisture. Photos, samples, and a quick on-site test all help to finalize the match before buying.
These two sections cover how to match new flooring with old.
The Matching Blueprint
A concise framework for assessing and matching new flooring to what you already have. The goal is to identify physical traits, measure precisely, evaluate surrounding architecture, and choose options that produce a uniform low-contrast transition between old and new surfaces.
1. Material Identification
Determine species or type first: white oak, red oak, maple, engineered boards, or laminate. Seek out factory stamps, installer notes, or receipts where possible. Inspect board ends and exposed edges to see construction: solid plank, multi-layer engineered, or glued laminate.
Notice grain, growth rings and any unique features such as mineral streaks or knots. These characteristics assist in drilling down species and veneer cuts such as plain-sawn or quarter-sawn. Hold a 10 to 20 cm sample up to a showroom. The visual comparison under store lights gives you a real first impression of the fit.
List visible characteristics in writing: species guess, dominant grain type, presence of knots, prominent color highlights, and any damage or filler used. Bring this list with you when meeting with a flooring pro. Use it to prevent misidentification and to establish realistic matching expectations.
2. Color Analysis
Evaluate stain color and natural tones in daylight when feasible. Photograph and sample from several spots. Color can change across a room due to sun exposure or wear. Note undertones, warm (yellow/red) or cool (gray/green).
Color-match tools/apps at stores, and ask manufacturers for stain codes when possible. Match samples under the same lighting that the finished floor experiences. Document each room’s available lux level and direction of light to expect perceived variances.
Write down exact stain names, brands, and tinting notes. Make notes on aged patina or sun-faded areas so you and your installer can determine whether to rejuvenate the old floor or choose a new board with purposeful diversity.
3. Finish & Sheen
Identify sheen: matte, satin, semi-gloss, or gloss. Touch the surface to determine if it is a hard film or an oil penetrate finish. Look for finish type labels on product scraps or the original installer.
Note wear patterns: high-traffic dulling or edge gloss retention. These influence how a new adjacent paragraph will look. Make a quick cheat sheet of finish type, sheen, restoration requirements and repairs to help you select.
4. Grain & Texture
Look at texture — smooth, wire-brushed or hand-scraped. Feel plank faces and look down grain for tooling marks or bevels. Match surface texture as tightly as you can to prevent visible seams in the spot where light grazes the floor.
Choose samples with like sawing and finishing marks. Do side-by-side checks in natural light and step on samples to observe shadowing and reflected sheen variations.
5. Plank Dimensions
Check width, length, and thickness using a caliper or tape. Record tongue-and-groove profiles. Record measurements in a numbered list so nothing is missed:
-
Width in millimetres.
-
Average length in millimetres.
-
Thickness in millimetres.
-
Tongue profile and bevel presence.
If sizes vary, inquire into custom milling or staggered layouts to camouflage discrepancy or select transitional pieces to bridge size gaps.
Inevitable Hurdles
Trying to match new floors to existing floors inevitably presents hurdles in color, grain, fit and flow. Here are the big challenges to anticipate and concrete actions to take control of them.
Fading & Aging
Older hardwood generally shifts tone from sun and wear. We know where the sun-drenched zones are and the walkways of high traffic, where the wood has mellowed or faded. Measure and photograph these areas in natural light to record the level of change. This record keeps your goals realistic.
Mix fresh wood by sanding adjacent areas or custom stain blends on new planks so they vibe closer in hue to abraded sections. Keep in mind that a precise 100 percent match is usually not possible. Aging inevitably alters the wood from a chemical and reflectance perspective.
If refinishing entire rooms is not viable, plan intentional solutions. Lay area rugs where contrast is greatest, reposition furniture to hide abrupt joins, or design a graded transition that accepts slight shifts rather than fights them.
Discontinued Products
Manufacturers discontinue lines every few years. Matching an older plank can be a dead end. Start by attempting to determine the species and original mill. Photos and a brief sample assist when contacting dealers.
If the precise plank is no longer available, look for similar ones and check out local showrooms with extensive selections. Consider custom options such as re-milling to match board width or edge profile and custom staining to mimic hue.
When time is short, these quick reference points help:
-
Discontinued product details: original species, plank width, finish type, edge profile, year installed
-
Potential alternatives include current collections with similar grain, engineered boards with matching thickness, and reclaimed boards from salvage yards.
-
Custom solutions: bespoke staining, milling to match dimensions, blending reclaimed with new
Lighting Deception
Radiance turns to hue. Test samples set at morning, noon, and night to catch differences a showroom can’t. New boards tend to feel lighter at first, so it is good to leave samples in the room for a few days to allow them to mellow.
Tweak the matching strategy by selecting stains or finishes that compensate for the room’s light levels and by cleaning with consistent products so older and newer boards age similarly. This is not an actual ‘floor’ plan.
Lighting and grain variations can cause mismatched grain patterns to pop immediately, even if the stains match, so grain compatibility is just as important as color.
Material Considerations
Pairing new flooring with existing surfaces demands a transparent perspective on material characteristics, aging, and how they connect. Below are dedicated sections for hardwood, laminate/LVP, and tile, then a quick comparison to assist in selecting the ideal path for your project.
Hardwood
As much as possible, select the same species and grade. Species affects grain, hardness (Janka), and natural color range. Oak, maple, and hickory are the most common because their prevalence makes it more likely that there is a closer visual match.
Full-length examples include red oak, which shows pronounced grain, maple, which is smoother and more uniform, and hickory, which has strong color variance. Occasionally you encounter an exact match. Earthy boards soften with sun and use, so the older the plank, the warmer the hues and gentler the contrast.
New boards can appear lighter initially and shift over months. Refinishing existing boards can aid in blending tones. Sanding depth, stain absorption, and finish luster all play a role in results and it may not be economical for every project.
Hire a pro installer who’s familiar with patching and feathering edges. With careful acclimation, end-matching, and selective board replacement, you can minimize the visible seams. Fill holes and imperfections with color matched filler and custom milling where required.
If grain patterns vary, mix new and old boards in a sawtooth or mixed pattern to confuse the eye instead of compelling a phony mate.
Laminate & LVP
With state-of-the-art color and texture printing, laminate and LVP do a convincing job of mimicking wood. Premium choices feature embossed textures and multi-layer construction that reflects light like actual wood. For pattern variation, look for planks with similar knot frequency and color streaks.
New laminate or LVP typically does a good job of visually blending but can’t impart the depth and aging behavior of solid wood. Employ transition strips when encountering hardwood. They conceal slight height variations and prevent harsh visual terminations.
If you can, get the same collection or factory dye lot. Manufacturers retire collections, so exact repeats may not exist anymore. Try to match plank width and plank length to stay in rhythm with adjoining wood floors.
Tile
Match tile color and size and grout width with adjacent wood. Rectangular tiles in plank proportions aid smooth flow. Choose grout color carefully. A contrasting grout will highlight joints and break the illusion, while a close match minimizes attention.
Transitions matter: use metal or wood trim and properly set thresholds to conceal height changes and prevent visible gaps. Think through tile placement such that grout lines land in reasonable places with respect to wood seams.
Bad alignment exposes the joint more than color mismatch. Matte or low-sheen tiles complement the old wood that doesn’t shine as much anymore.
-
Hardwood is characterized by its authentic grain, it is refinishable, it ages with sunlight, it has a variable cost, and it requires higher maintenance.
-
Laminate/LVP offers consistent color, textured surfaces, lower cost, limited refinishing, and good durability.
-
Tile is highly durable, has a wide color and finish range, grout lines are visible, and it requires precise transition planning.
The Art of Transition
Transitions connect various flooring materials and maintain a room looking designed instead of slapped together. They bridge height differences, conceal gaps and provide another opportunity to inject style. Here are hands-on techniques and explicit instructions for crafting transitions that span room boundaries, material shifts and different elevations.
T-Molding
Install T-molding where two floors meet at the same height to create a clean, almost invisible seam. Once you’ve properly measured the distance, cut your T-molding to length and center it in the doorway or opening.
Choose a finish near both floors. A mid-tone stain wood-to-wood or a neutral vinyl cap for engineered floors assists the join to read as deliberate. Utilize T-molding in high-traffic doorways to minimize lifting.
Nail it so that it won’t move around when stepped on. Make sure the rail is flush and the top edges are even with the floor planes so nothing becomes a tripping hazard while the eyes remain unbroken.
Contrasting Borders
By using contrasting borders, a change in material becomes a design move instead of a hassle. Choose a border material that complements both surfaces: a narrow band of darker wood around a lighter parquet, or a strip of stone between tile and hardwood.
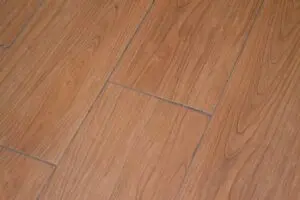
Design the width to fit the scale of the room. Use narrow stripes measuring 20 to 40 mm for small rooms and broad stripes measuring 50 to 150 mm for more opulent spaces. Map out the pattern before cutting.
Use borders to frame functional zones, like a cooking area within a larger open plan, even diagonal or herringbone inserts for a more dramatic architectural flourish. Scribed and glued borders pry less open. Prefinished edges do not take stain extra and create a ragged transition.
Room Dividers
Threshold strips and room dividers control level changes and large open spaces. Choose finishes — brass, aluminum, wood or coordinating tile — that relate to trim, hardware or fixtures in nearby rooms.
Place dividers at natural breaks: door centers, the end of a run of cabinetry, or where a hallway meets a living area. If you have uneven subfloors, install adjustable metal thresholds or build up a substrate for a smooth cap.
Turn dividers into a design statement by selecting a profile with slight curves or a thin contemporary reveal. They can register as intentional lines that shape flow and ground furniture configurations.
Professional Intervention
Professional intervention provides the technical proficiency and equipment that makes matching new flooring to existing floors not just possible but long-lasting. A quick walk-through by a floor specialist pinpoints material, finish, wear and structural issues. Following this, focused services, such as bespoke staining, refinishing and expert sourcing, are scheduled and executed to provide a cohesive look throughout rooms or connecting spaces.
Custom Staining
Custom staining matches new wood to the color and intensity of the existing floor. Professionals slice sample boards from the identical species, lay down several stain coats, and aging treatments until the sample looks visually similar next to the installed floor.
Try test samples under the same light as the room. Natural and artificial light expose different undertones. Apply custom staining in patch repairs or when extending planks to high-traffic areas where new wood seems too new.
Keep detailed records: stain brand, color code, dilution, application time, and number of coats. Such notes expedite subsequent repairs and maintain a uniform outcome years later.
Refinishing
Refinishing smooths out differences in tone, sheen, and texture between old and new portions by sanding and recoating the entire floor surface. Sanding eliminates surface inconsistencies, scars, and mill marks and sets up both old and newly stained wood for a unified finish.
Select a finish — waterborne, oil-modified, or penetrating oil — according to durability requirements and the sheen of the existing floor. For mixed-age floors, nothing beats full-floor sanding as a guarantee to remove the visible transitions.
Pair refinishing with other invasive projects and schedule drying times in days to align the project with both household availability and the climate.
Expert Sourcing
Professional intervention for professional sourcing limits species, cut and plank size to minimize visual mismatch prior to installation. Industry pros tap supplier networks and showroom floor access to find discontinued grades, matching grain patterns, and plank widths.
Request several full-size samples and bring them into the room to see under the same lighting and next to your current floor. When exact materials are no longer available, they recommend similar substitutes and pattern mixes that camouflage variations, like mixed-width boards or borders.
Trust pro sourcing to reduce return risk, eliminate time spent hunting materials, and guarantee a uniform installation that withstands real life.
Demand a site visit and a proposal with stain tests, refinishing scope, material sources, timelines, and cost estimates. Most companies provide a complimentary consultation.
Beyond The Surface
When matching new flooring to existing flooring, you have to look beyond the surface. Your subfloor and underlayment set the stage for fit, feel, and long-term performance. Taking care of these factors up front prior to installing new planks minimizes callbacks and maintains the appearance you anticipate. The subheadings below dissect examination, fabrics, and design decisions that make a winning game.
Subfloor Integrity
Check the subfloor for moisture, rot or deflection with a moisture meter and at seams and fastener locations visually. Old water stains, soft spots when you press, or gaps at joints are all signs that it’s time for repairs. Irregularities exceeding 3 mm over 1 meter will tend to telegraph through hard floor coverings and must be leveled.
Immediately repair or replace areas damaged. Substitute swollen, delaminated plywood or OSB panels. Sister joists or add blocking where bounce exists. For concrete slabs, inspect for cracking and vapor drive. Address this with vapor barriers or patching compounds to flooring manufacturer requirements.
Confirm compatibility: engineered wood, solid hardwood, vinyl, and laminate each have different subfloor flatness and moisture limits. Cement backer for tile is not going to behave the same as plywood under hardwood. Record the pre-install condition with photos and short notes. It aids future owners and prevents contractor disputes.
Underlayment Role
Choose an underlayment compatible with both the new product and the existing floor. Cork, foam, rubber, or cement board each alter sound, insulation, and feel. Install a firmer underlayment where sound control counts over apartments or duplexes.
Underlayment conceals minor subfloor imperfections and smooths weight distribution. It can support thin vinyl or laminate and reduce clicks in floating floors. Thickness must be chosen with care. If it is too thick, it will raise the finished height and create awkward thresholds. If it is too thin, it may transmit subfloor flaws.
Match underlayment height and compressibility to existing runs so doors still clear and transitions stay neat. Follow manufacturer instructions for overlap, adhesive, and seam sealing to maintain warranties and long-term performance.
Installation Direction
Try to align new planks with old boards whenever you can, so they visually flow. Running planks parallel to the longest wall or toward a main window still applies as a general rule. Follow the existing grain direction for consistency.
Aim for architectural lines or around fixtures. In L-shaped or open plans you might require a compromise in balance. Use a transition strip at a doorway or a quiet border to hide direction changes.
Standardize fastener and expansion gap techniques between adjacent spaces. Design changes where board direction shifts incorporate thresholds, reducers, or inlay borders to interrupt the eye and shield edges.
Conclusion
Matching new flooring to existing flooring demands straightforward action and realistic design. Match new flooring to old for color, tone, and plank size. Try samples in the room light. Choose a transition appropriate for the gap and foot traffic. Anticipate little joins to reveal. Match underlay and height to prevent trips. Hire a pro for tricky cuts or uneven subfloors. Use real examples: blend a 90 cm oak plank with a 120 cm new board by aligning grain and finish. Use a thin metal strip between tile and wood on a busy hallway. Add a 5 mm ramp where heights differ. It’s the little stuff that makes all the difference. If you’re ready to move forward, book a sample fitting or get one quote from a local flooring pro today.
Frequently Asked Questions
How do I match new flooring to existing flooring when the same material is unavailable?
Match the new flooring to the existing flooring with a similar color, grain, and finish to blend. Match plank width and direction. Install new flooring in less conspicuous locations or transition to divide spaces. This minimizes color contrast and looks more cohesive.
Can I mix different flooring materials in the same room?
Yes. Maintain consistent color temperature, scale, and edge treatment. If you’re trying to match new flooring to old, use a thin transition strip or design break, like a border, to mark the change. Good planning forestalls a piece-mealed look.
What is the best way to transition between two different floor heights?
Match it with a tapered reducer or threshold to either one of the floor finishes. For minor height variations of up to approximately 6 mm, a thin transition strip does the trick. For bigger disparities, a step or ramp may be put in place by a professional.
Will sanding and refinishing old wood help match new planks?
Frequently yes. If matching new to old flooring, refinishing the old to a target color can help bring it closer to new planks. Try a small test area first. Matching species, stain, and finish sheen all matter for the best result.
How do I match color when existing flooring has faded?
Bring a sample to the supplier and compare it under natural light. Stain or custom finish the new flooring to blend in with the old. For serious fading, re-dying the older floor may be the most cohesive option.
When should I hire a professional for matching and installation?
Hire a pro if floors are different species, thickness, or transitions and leveling need to be done. They guarantee proper structural prep, spot-on cutting, and smooth transitions, taking time and expensive errors out of the equation.
Are transition strips necessary for matching floors across rooms?
Not always, but they come in handy when the materials, heights, or expansion needs don’t match up. Transition strips protect edges and provide a nice visual break. They tend to increase durability and minimize installation problems.